Add a single device
Use this when you know the device in advance: a prototype on your desk, a gateway going to one customer, a replacement for a unit that failed. You register it in Connhex, get a token, and put the token on the device.
For production runs, put one token in the image instead and let devices ask to join as they come online. See Fleet enrollment.
1. Register the device
Open Devices and choose Add device. A name is the only required field.
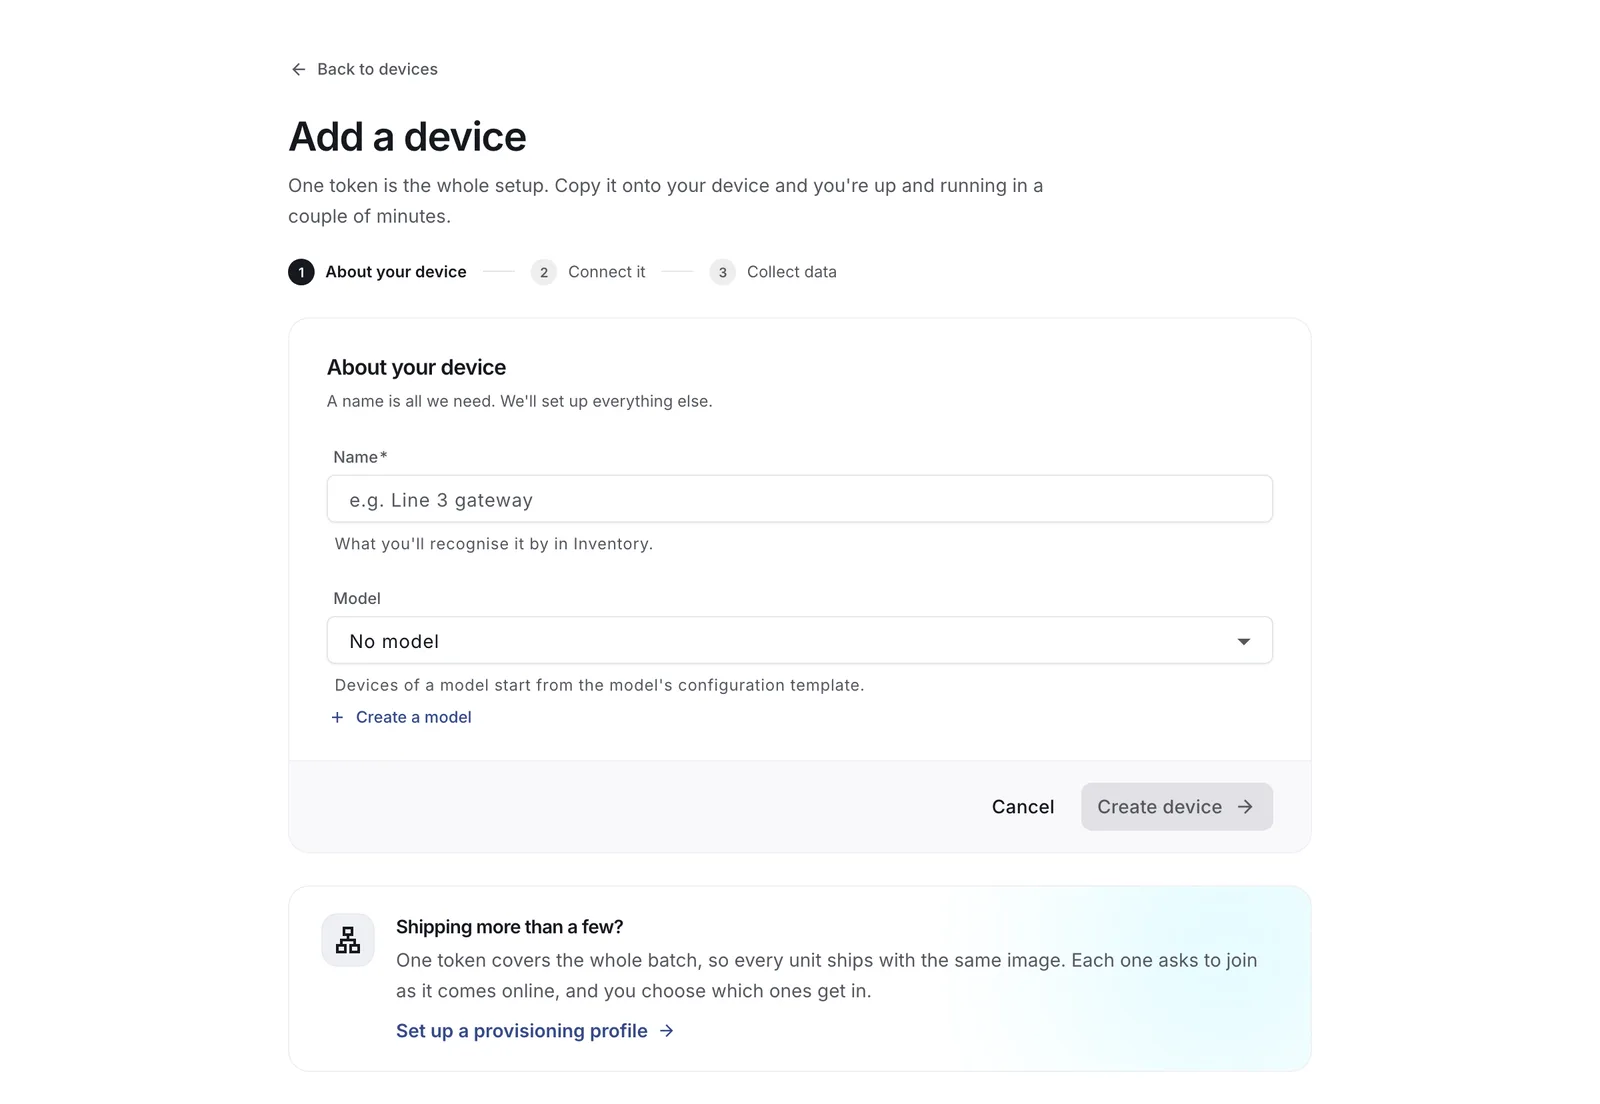
Setting a model is optional and worth doing. Devices of a model start from that model's configuration template, and models are what firmware compatibility and update campaigns are built around.
2. Put the token on the device
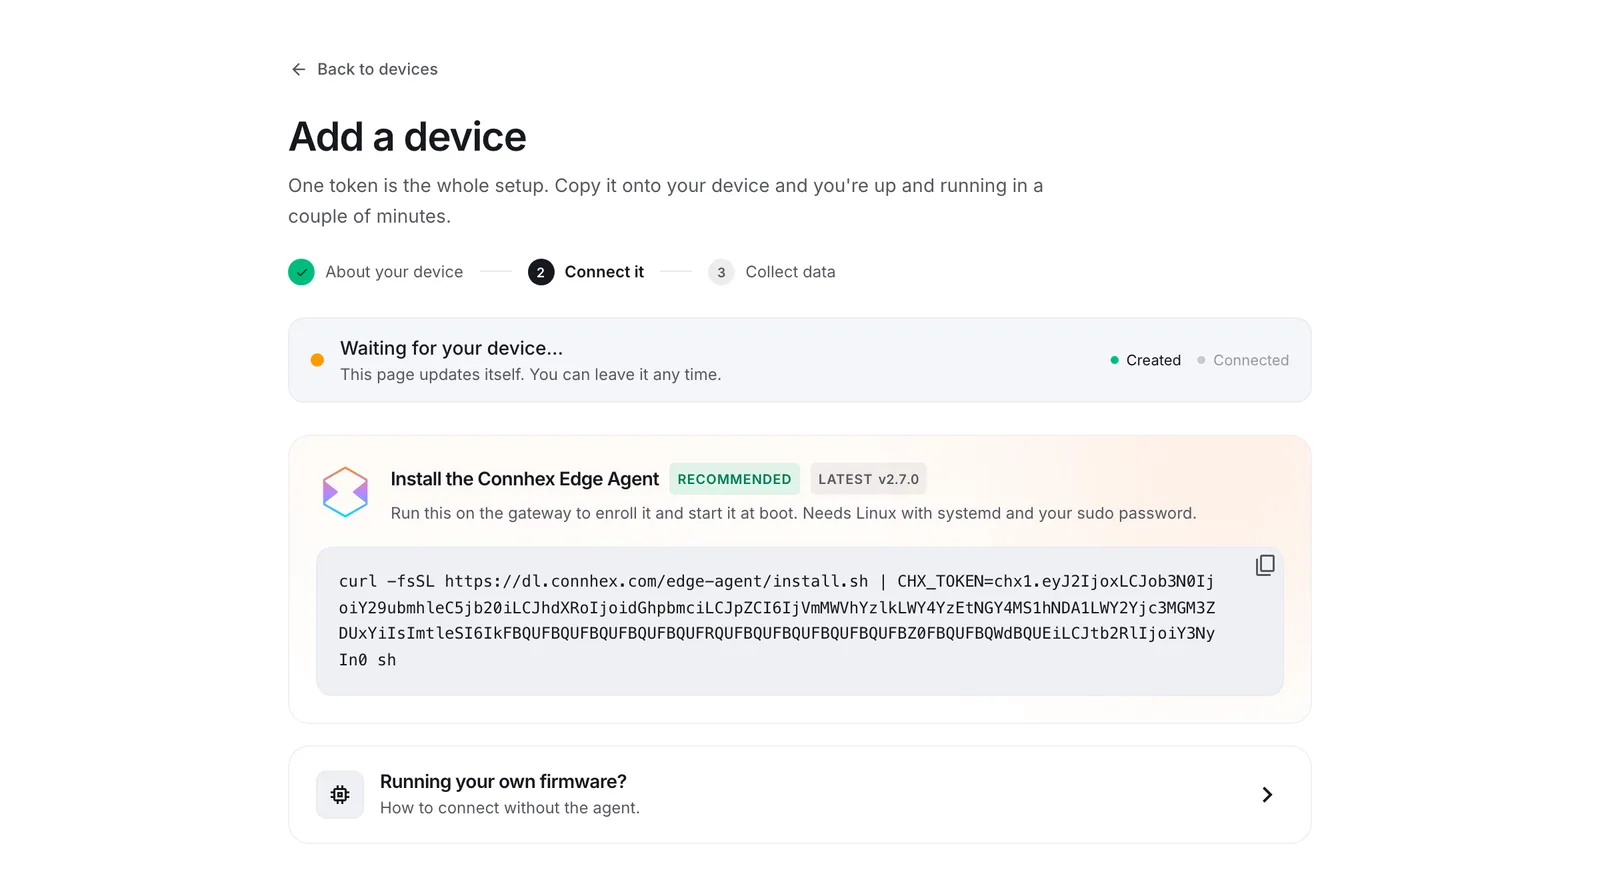
The device appears straight away, and the next screen carries its enrollment token. The suggested command will install Connhex Edge Agent that will take care of the enrollment steps.
If you plan to use your custom firmware/agent instead, take a look at Enrolling your own firmware.
Registering devices from your production line
Once you are building in quantity, fleet enrollment is usually the better answer: one token goes in the image you flash your devices with and units will announce themselves to Connhex as they come online. A provisioning profile can be configured to automatically accept devices from an allowlist.
Registering in advance still earns its place when the record has to exist before the device does, for instance when an ERP tracks a unit from the moment it is built. Connhex Provisioning is an API, so a test station can register devices one at a time or a batch at a time. The request shapes are in the API reference.
On an Enterprise instance whose devices all belong to one owner, SnapLink skips the token entirely and is the quickest way to bring a device in: with no credentials configured, the agent announces itself, and you approve it from Connhex Control. Announcements are visible across the whole instance, which is what keeps SnapLink to that arrangement. See SnapLink.